
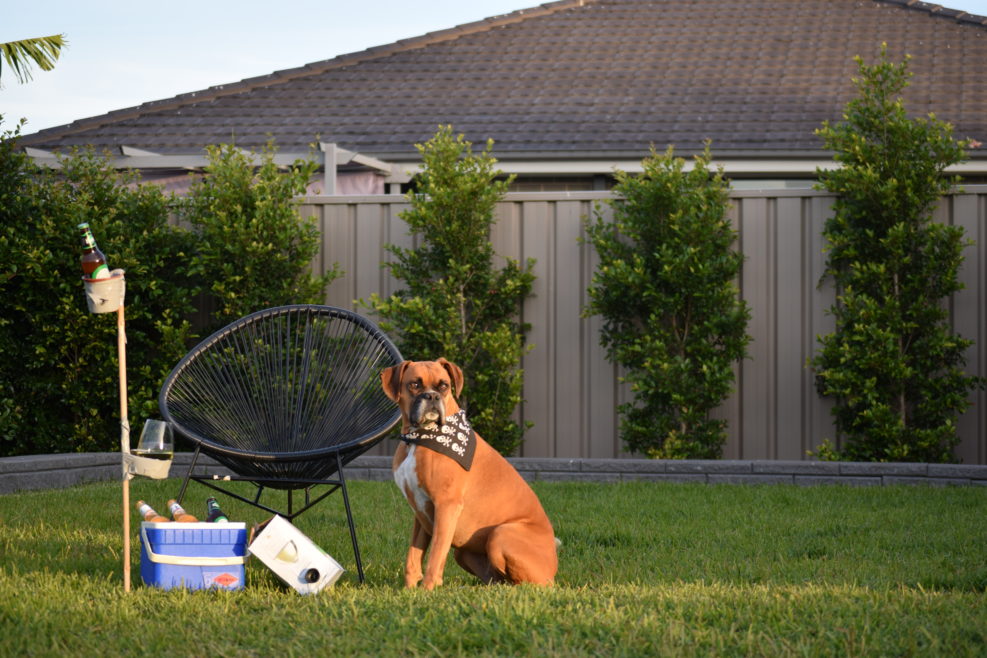
Full disclosure: this DIY project addresses a very specific problem – how to more conveniently manage a drink without a table when you need your hands free while sitting on a chair outdoors on grass (or similar).
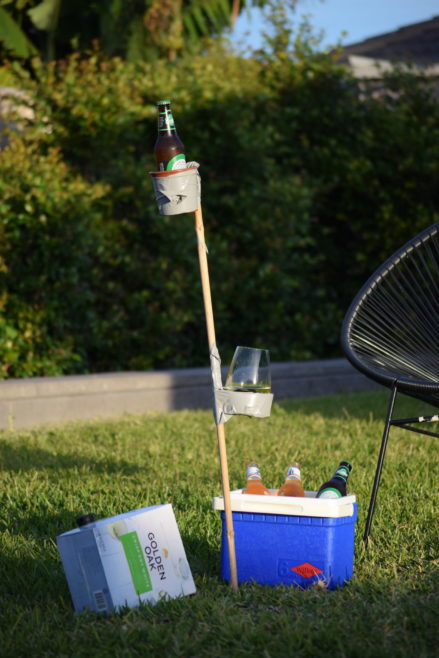
Emancipate yourself from a nightmarish existence with this simple DIY project. In a just few illustrated steps, I’ll show you how to upcycle junk from your garage into your own portable, alfresco drinkstand.
Materials You’ll Need:
- Tape, preferably waterproof.
- Scissors, knife, or sharp teeth
- Two containers. Like from when you bought that tomato plant last spring, and you kept the empty plastic container because maybe it’d come in handy one day and it seemed a shame to waste it even though it’s a bit dirty and not really the right size or nice looking enough to actually get used and you already have half a dozen others but hey just keep it because you never know.
- One bamboo cane, dowel, child-size javelin, inanimate carbon rod etc.
- Drinkies, for testing / quality-assurance.
Step-by-Step Instructions
Step 1: Sharpen A Stick
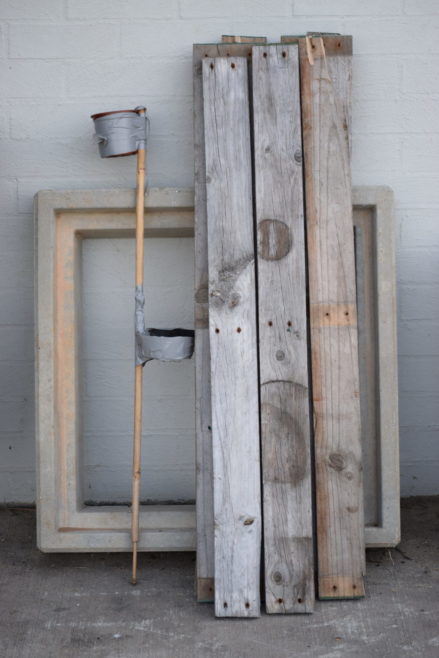
Size matters, so carefully consider the stick’s ideal length and girth. You’ll want it long enough to hold your drinks at the most convenient height, to prevent over-exertion when drinking. Choose a stick sufficiently rigid to resist bending too far under the combined weight of your favourite tipples. I.e. avoid balsa wood if you drink your wine straight from the bottle.
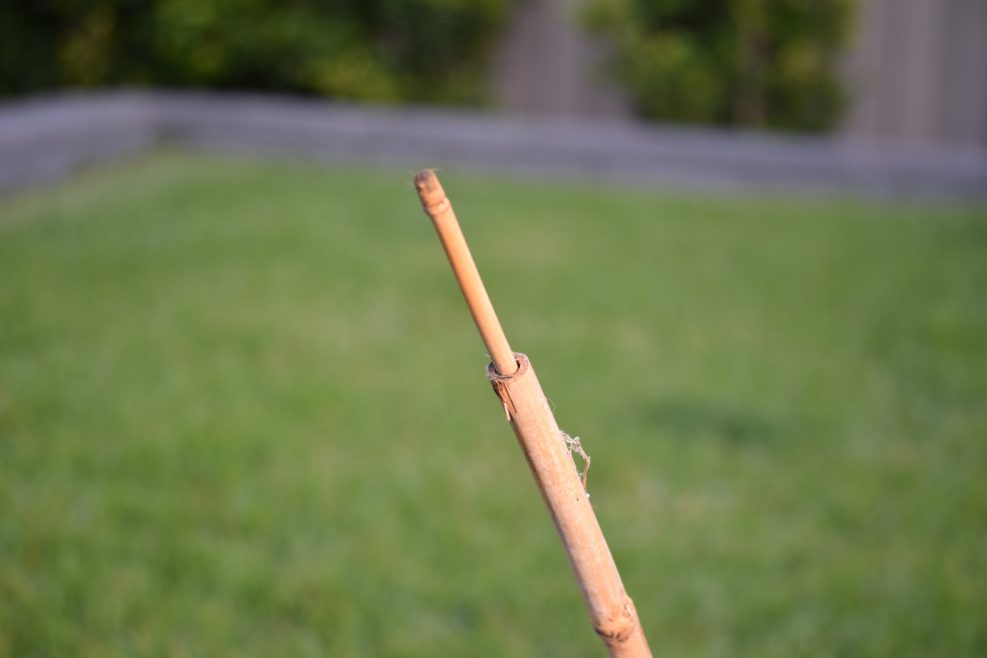
The wise beachgoer digs thrusts their umbrella deep into the sand, lest it lead them on a frantic and embarrassing chase downwind. Similarly, spearing your drinkstand into the earth grants it the strength to hold aloft your liquid vice. Here I’ve wedged a smaller piece of bamboo into the base to form the spike, but alternatively you could glue something pointy to the base: a large nail maybe, or the wooden anti-vampire stake you put beside the bed after watching one too many late-night horror movies while home alone.
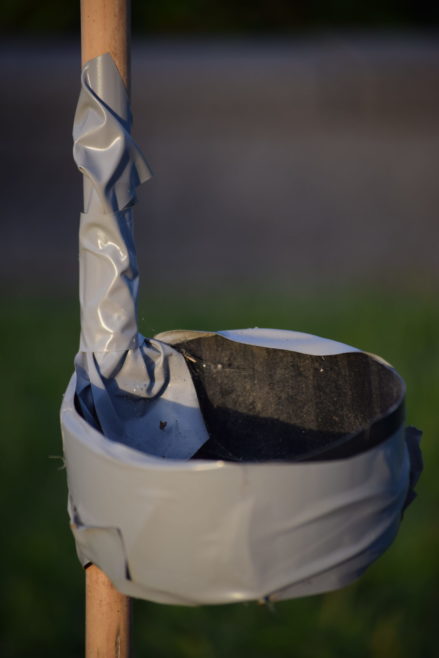
Step 2: Attach Top Drink Holder
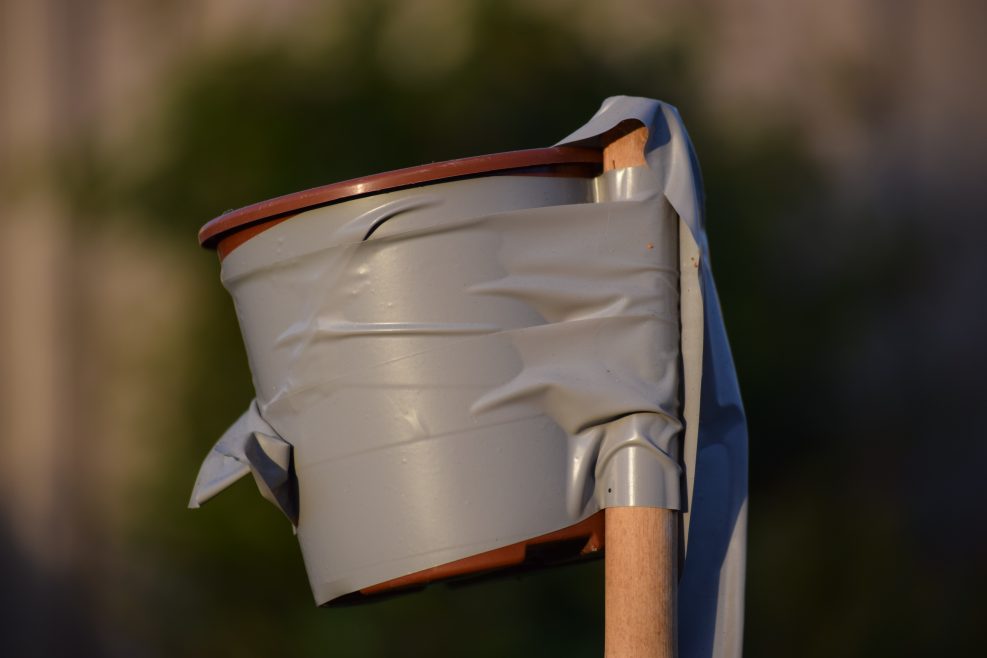
Securely bind one container to the top of the stick. Aim to have the container’s base as close to horizontal as possible – a leaning glass makes for a nervous evening.
Choose your container carefully: too shallow and your champagne flute will topple right out, but too deep and the contents of that whiskey glass won’t be meeting your mouth without a straw. Consider replacing all your existing glassware with a single standardised set of plastic fast-food chain promotional cups, compatibly sized for your new drinkstand.
Step 3: Attach Lower Drink Holder
You might consider using a second container of a different style, to better accommodate all forms of drinks. Or hey, even snacks now I think of it. For a touch of class, drainage holes will prevent drinkware accumulating a sticky layer of muck underneath.
While these instructions are for the model that holds two drinks, simply repeat Step 3 if you’re especially popular and/or alcoholic.
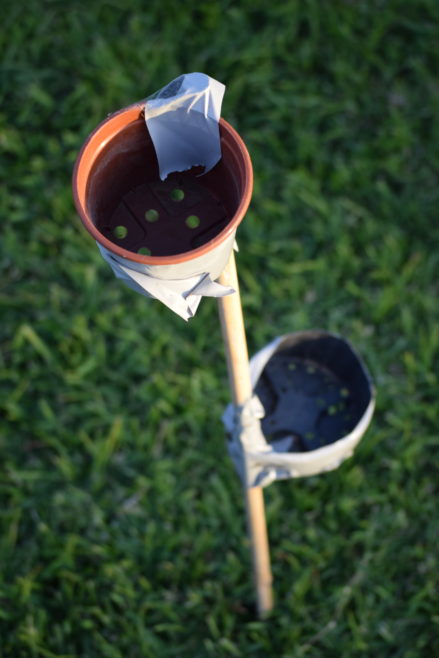
Enhance stability by offsetting each drink holder relative to the others. You could draw inspiration from nature, where leaves can be spaced around a stem consistent with the Fibonacci number sequence. Or maybe just wing it.
Step 4: Testing
Prudence dictates testing your creation before entrusting it with craft beers or fine wines, particularly if you’ve little experience in balancing variously-sized beverages on containers taped to a stick shoved into the ground. Start with your most expendable drinks.
Don’t worry if the drinkstand has a lean, doesn’t look sturdy, or has some other slight imperfection. Think of it as a game, mixing and matching your drinks across the evening to get the lean just right.
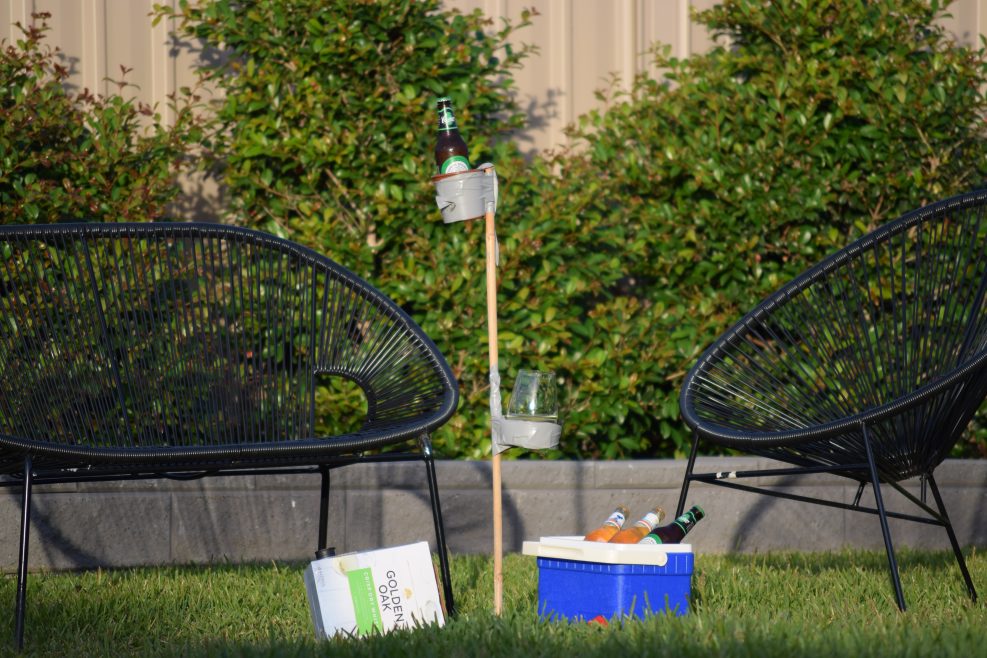
Step 5: Enjoy
Congratulations, you can now enjoy the fruits of your long minutes of manly labour. Sit back, gaze proudly on your creation, and luxuriate in convenient and affordable suburban bliss.
Did you like this article?
Do you like this site?